May 08, 2007

It's been a long time since the last edition of TechBits, so I promise that this one is really good. If you use iTunes, here's how to control iTunes (play/pause, previous/next track) without having to up the iTunes window! Yes, even if you don't have a multimedia keyboard!
- Download and install AutoHotkey. AutoHotkey is a handy-dandy free utility for programming keyboard hotkeys. Don't worry; it takes up very few resources and it's safe!
- Fire up the text editor of your choice and create a text file called AutoHotkey.ahk in My Documents, with the following contents:
- Run/double-click on AutoHotkey.ahk. This will start up AutoHotkey with the script running.
- Copy the Start Menu shortcut to AutoHotkey to the Startup folder in the Start Menu so that AutoHotkey automatically runs on startup. AutoHotkey will automatically open and run AutoHotkey.ahk in My Documents when it runs.
- If you don't want the AutoHotkey system tray icon to be shown, add a new line to the start of AutoHotkey.ahk containing "#NoTrayIcon" (without the quotes).
DetectHiddenWindows, On
#/::
IfWinExist, ahk_class iTunes
ControlSend, ahk_parent, {SPACE}  ; Pause/Play
return
#,::
IfWinExist, ahk_class iTunes
ControlSend, ahk_parent, ^{LEFT}  ; Previous
return
#.::
IfWinExist, ahk_class iTunes
ControlSend, ahk_parent, ^{RIGHT}  ; Next
return- Play/Pause: Win + / (slash)
- Previous Track: Win + , (comma)
- Next Track: Win + . (period)
Labels: AutoHotkey, hacks, iTunes, TechBits
March 08, 2007
The first edition of TechBits comes courtesy of Lifehacker. You know how Firefox resizes images to fit in the browser window when they're too large for it? Personally, I find that annoying, and if you don't like how Firefox behaves, here's how you can disable that feature:


- Open a new tab (Ctrl+T) in Firefox. Type about:config in the address bar and press Enter.
- In the "Filter" text box, start typing browser.enable_automatic_image resizing. You don't need to type the whole thing; you just need to make the setting appear in the list below.
- Double click on the browser.enable_automatic_image resizing entry in the list and the value should change to false.
- You're done!
January 18, 2007
(Warning: No one but the geekiest of IT professionals will appreciate this anecdote I am about to share. Prepare to be excited.)
One of the projects I'm involved in at work right now requires the hosting of a number of files on an intranet web server. After going through the proper channels and a considerable amount of red tape, a Windows Server 2003 machine was provided for us. However, it was completely useless for our purposes as it did not have IIS installed. (What use is Windows Server 2003 without IIS?!?)
As the lone resource allocated to the project, I was given admin access to the server so I was able to connect to it remotely. I attempted to install IIS (by adding the Application Server role) but the installation files were not to be found anywhere on the server. I had a choice to make. I could
Method #1 - The brute force approach (Kids, do not try this at home!)
I couldn't find an installation disc for Win2K3 anywhere around the office and I didn't want to download the whole thing off of MSDN. All I needed were the IIS files. So I thought that maybe the installer can use the files off of an existing IIS 6.0 installation.
I had remote admin access to another Win2K3 machine which I knew had IIS installed. This second server was on the same network as the one I was setting up. A file search revealed that most of the files the installer was looking for were to be found in the WINNT folder and its sub-folders. So what I did was point the installer in right direction by telling it to look in the ADMIN$ share (which by default points to WINNT) of the second Win2K3 machine. I had to change the source path from time to time, but it was less of a hassle than the alternative.
I thought it was smooth sailing from there on in, until I reached the halfway point of the progress bar, when the installer started asking for "iis6.cab". But of course, iis6.cab didn't exist on the second machine because it only contains the contents of iis6.cab, not iis6.cab itself because it didn't have the actual installation files. Sadly, I had to abort the operation.
Method #2 - Slightly less brute brute force (Do not attempt without adult supervision)
I was resigned to having the experts install IIS when I realized another resource. I had dabbled a some time ago in researching on BizTalk and for testing purposes, I used a virtual machine which I downloaded from here. I remembered that it had Win2K3 installed, and more importantly, it had all the installation files on disk (for evaluating the different server functions).
I couldn't access the virtual machine from the remote server (VPN reasons) so I first copied all the installation files (around 700 MB) from the virtual machine to a folder on my local machine. I shared this folder over the network and I pointed the installer to this share. Because of the slow connection, I waited half an hour, but it worked! IIS was installed!
Post-installation
One of the requirements for the project was hosting some videos on a website. For this, I decided to use FLVs and FlowPlayer, a free embeddable FLV player. I got the FLVs and FlowPlayer up on the freshly installed web server, but somehow, the FLVs weren't being served and I was getting "Page cannot be found" errors. In another funky solution to a funky problem, the Wikipedia article on FLVs revealed a hint: the MIME type for FLVs was "video/x-flv".
(You can configure MIME types for a website by opening its properties page in the IIS snap-in, going to the "HTTP Headers" tab, and clicking on the "MIME Types..." button.)
I got around to telling the proper channels that their help was no longer necessary and was lauded for my brilliantly creative yet unorthodox solution.
One of the projects I'm involved in at work right now requires the hosting of a number of files on an intranet web server. After going through the proper channels and a considerable amount of red tape, a Windows Server 2003 machine was provided for us. However, it was completely useless for our purposes as it did not have IIS installed. (What use is Windows Server 2003 without IIS?!?)
As the lone resource allocated to the project, I was given admin access to the server so I was able to connect to it remotely. I attempted to install IIS (by adding the Application Server role) but the installation files were not to be found anywhere on the server. I had a choice to make. I could
- Go through the proper channels, get stuck in more red tape, and have the experts install IIS on the server; or
- Be the hero and find my own way to install IIS.
Method #1 - The brute force approach (Kids, do not try this at home!)
I couldn't find an installation disc for Win2K3 anywhere around the office and I didn't want to download the whole thing off of MSDN. All I needed were the IIS files. So I thought that maybe the installer can use the files off of an existing IIS 6.0 installation.
I had remote admin access to another Win2K3 machine which I knew had IIS installed. This second server was on the same network as the one I was setting up. A file search revealed that most of the files the installer was looking for were to be found in the WINNT folder and its sub-folders. So what I did was point the installer in right direction by telling it to look in the ADMIN$ share (which by default points to WINNT) of the second Win2K3 machine. I had to change the source path from time to time, but it was less of a hassle than the alternative.
I thought it was smooth sailing from there on in, until I reached the halfway point of the progress bar, when the installer started asking for "iis6.cab". But of course, iis6.cab didn't exist on the second machine because it only contains the contents of iis6.cab, not iis6.cab itself because it didn't have the actual installation files. Sadly, I had to abort the operation.
Method #2 - Slightly less brute brute force (Do not attempt without adult supervision)
I was resigned to having the experts install IIS when I realized another resource. I had dabbled a some time ago in researching on BizTalk and for testing purposes, I used a virtual machine which I downloaded from here. I remembered that it had Win2K3 installed, and more importantly, it had all the installation files on disk (for evaluating the different server functions).
I couldn't access the virtual machine from the remote server (VPN reasons) so I first copied all the installation files (around 700 MB) from the virtual machine to a folder on my local machine. I shared this folder over the network and I pointed the installer to this share. Because of the slow connection, I waited half an hour, but it worked! IIS was installed!
Post-installation
One of the requirements for the project was hosting some videos on a website. For this, I decided to use FLVs and FlowPlayer, a free embeddable FLV player. I got the FLVs and FlowPlayer up on the freshly installed web server, but somehow, the FLVs weren't being served and I was getting "Page cannot be found" errors. In another funky solution to a funky problem, the Wikipedia article on FLVs revealed a hint: the MIME type for FLVs was "video/x-flv".
(You can configure MIME types for a website by opening its properties page in the IIS snap-in, going to the "HTTP Headers" tab, and clicking on the "MIME Types..." button.)
I got around to telling the proper channels that their help was no longer necessary and was lauded for my brilliantly creative yet unorthodox solution.
October 10, 2006
All the HP-issued laptops here at the office are Windows XP Professional machines configured to the same standard. For some reason, the Server service cannot be found on the list of services in the Services MMC snap-in (Start -> Run -> "services.msc"). The Server service is necessary to create shared folders and printers that can be accessed over the network. As it stands, there's no way for us to share files (e.g., music and photo albums, movies) to our fellow officemates.
One of my teammates needed to transfer files from his old laptop to his new one (same as mine). Thankfully, I found a way to install the missing Server service:
One of my teammates needed to transfer files from his old laptop to his new one (same as mine). Thankfully, I found a way to install the missing Server service:
- Go to Control Panel -> Network Connections.
- Right-click on your LAN connection (usually named "Local Area Connection") and click on Properties.
- Under the General tab, select File and Printer Sharing for Microsoft Networks and Uninstall.
- Restart your computer.
- Go back to your LAN connection's properties and click on the Install button.
- Select Service, click on Add, and (re)install File and Printer Sharing for Microsoft Networks.
- Restart your computer.
- The Server service should now be listed (and started) in the Services MMC snap-in and you can share any folder by looking at the Sharing tab in its properties.
- If there is no option to share the folder, go to Explorer -> Tools menu -> Folder Options -> View tab -> Advanced settings list -> uncheck Use Simple File Sharing.
Labels: hacks, Windows XP
September 17, 2006
If you've accidentally discovered that labels will still be listed for a post with the old templating system (like I have), then you must be a bit annoyed that you can't change the way they look. A closer inspection of the Blogger-generated HTML reveals that the labels (e.g., "Labels: Blogger Beta, hacks") are enclosed in a paragraph (p tag) with a CSS class of "blogger-labels".
If you know how to edit your blog's template (I've written a short how-to here), it's a simple matter of handling the blogger-labels class by editing your stylesheet. This is how I made the labels look just a bit smaller than the entry text:
Next hack: How to change the way the labels are listed. I want to change the header from "Labels: " to "Filed under: " and get rid of the comma delimiter. Haven't found a way so far.
If you know how to edit your blog's template (I've written a short how-to here), it's a simple matter of handling the blogger-labels class by editing your stylesheet. This is how I made the labels look just a bit smaller than the entry text:
.blogger-labels { font-size: 0.86em; }Next hack: How to change the way the labels are listed. I want to change the header from "Labels: " to "Filed under: " and get rid of the comma delimiter. Haven't found a way so far.
Labels: Blogger Beta, hacks
August 26, 2006
Ever wondered how to add those "Add to..." buttons (e.g., "Digg this!", "Add to del.icio.us") to your site or blog? A lot of people are doing it and there are some good sites where you can learn how. It takes a bit of effort though because you have to copy and paste those URLs and add those cutesy little icons too.
I soon gave up on this because I figured that there just had to be an easier way. Enter Bookmarkz. It's a service that makes it a cinch to add social bookmarking links to any page. Just select the social bookmarking services you want to use (a whopping 94 to choose from!), choose whether you want just icons/text/both, specify a separator, insert the generated HTML code into your template, and that's it! Here's an example of how it'll look like:

One disadvantage with Bookmarkz is that it's a bit slow to load. So if you noticed, you won't see any bookmarklets on the RubeTube's main page, but you'll find them in the individual item pages (take a look here). But that's okay because Bookmarkz will only work on individual pages because it bookmarks by the page title and URL, so I can't use it with every single item on the main page.
If you are using Blogger, you'll probably need to add Bookmarkz' HTML code someplace after <$BlogItemBody>. Enclose it in an tag to make sure it only appears in the individual item pages:
Give Bookmarkz a try today!
P.S. You may have noticed that I have no shame in promoting services that I like. It's just my way of helping out; people who have a normal life don't have time to learn about these things. Too bad I'll never get any endorsement deals (probably not anytime soon anyway).
I soon gave up on this because I figured that there just had to be an easier way. Enter Bookmarkz. It's a service that makes it a cinch to add social bookmarking links to any page. Just select the social bookmarking services you want to use (a whopping 94 to choose from!), choose whether you want just icons/text/both, specify a separator, insert the generated HTML code into your template, and that's it! Here's an example of how it'll look like:
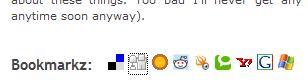
One disadvantage with Bookmarkz is that it's a bit slow to load. So if you noticed, you won't see any bookmarklets on the RubeTube's main page, but you'll find them in the individual item pages (take a look here). But that's okay because Bookmarkz will only work on individual pages because it bookmarks by the page title and URL, so I can't use it with every single item on the main page.
If you are using Blogger, you'll probably need to add Bookmarkz' HTML code someplace after <$BlogItemBody>. Enclose it in an
<$BlogItemBody$>
...
<ItemPage>
 <script src=...></script>
</ItemPage>
Give Bookmarkz a try today!
P.S. You may have noticed that I have no shame in promoting services that I like. It's just my way of helping out; people who have a normal life don't have time to learn about these things. Too bad I'll never get any endorsement deals (probably not anytime soon anyway).
This handy-dandy tip is for Blogger users who want to get rid of the Blogger NavBar that pollutes the top of your blog. If you've decided that you simply cannot live without the NavBar, then turn away before things get messy.
Edit your blog's template and add the following HTML code in between the <head>...</head> section of your template. It should be near the top.
For Blogger beta users, use #navbar-iframe instead of #b-navbar:
If you already have an existing CSS stylesheet, then simply add the above rule for #b-navbar (#navbar-iframe for beta users).
BTW, I am not saying that you should remove the NavBar. I believe that you should have a choice in whether or not you want a NavBar on your Blogger blog, especially if you think that it affects your site's aesthetics (like I do). Consider that having a NavBar can be a benefit to your readers, especially to those who like to blog-hop.
Also, another thing to consider. I'm not a lawyer, but after carefully reading through the Terms of Service, I don't believe that removing the NavBar counts as a violation. Take a closer look at point #10, which states that you can't remove Blogger's advertising. I don't think the NavBar counts as advertising; they don't make any money from having it displayed. However, be a nice fella and provide a link or a button back to Blogger somewhere on your blog.
Edit your blog's template and add the following HTML code in between the <head>...</head> section of your template. It should be near the top.
<style type="text/css">
#b-navbar { height:0px; visibility:hidden; display:none; }
</style>
For Blogger beta users, use #navbar-iframe instead of #b-navbar:
<style type="text/css">
#navbar-iframe { height:0px; visibility:hidden; display:none; }
</style>
If you already have an existing CSS stylesheet, then simply add the above rule for #b-navbar (#navbar-iframe for beta users).
BTW, I am not saying that you should remove the NavBar. I believe that you should have a choice in whether or not you want a NavBar on your Blogger blog, especially if you think that it affects your site's aesthetics (like I do). Consider that having a NavBar can be a benefit to your readers, especially to those who like to blog-hop.
Also, another thing to consider. I'm not a lawyer, but after carefully reading through the Terms of Service, I don't believe that removing the NavBar counts as a violation. Take a closer look at point #10, which states that you can't remove Blogger's advertising. I don't think the NavBar counts as advertising; they don't make any money from having it displayed. However, be a nice fella and provide a link or a button back to Blogger somewhere on your blog.
Labels: Blogger, Blogger Beta, hacks
August 16, 2006
In case you hadn't noticed, I've made some changes to my blogroll. But that's okay, you shouldn't be able to notice the difference anyway.
I decided to migrate my entire blogroll to my del.icio.us. I took a look at BlogRolling as an alternative but I decided to use del.icio.us since it could serve the same function and I don't like having too many accounts on all those services trolling the web.
There are a number of advantages to this. If anyone wants to see my blogroll, you'd just have to look at my bookmarks tagged "blogroll". Also, it's easier to maintain since I don't have to fiddle with my Blogger template when I need to make changes. All I need to do to display my blogroll is to insert a nifty linkroll script. Lastly, if ever I decide to move my blog, it'd be easier to move the blogroll as well.
BTW, if you're still not on my blogroll (and you want to be on it), please drop a comment.
I decided to migrate my entire blogroll to my del.icio.us. I took a look at BlogRolling as an alternative but I decided to use del.icio.us since it could serve the same function and I don't like having too many accounts on all those services trolling the web.
There are a number of advantages to this. If anyone wants to see my blogroll, you'd just have to look at my bookmarks tagged "blogroll". Also, it's easier to maintain since I don't have to fiddle with my Blogger template when I need to make changes. All I need to do to display my blogroll is to insert a nifty linkroll script. Lastly, if ever I decide to move my blog, it'd be easier to move the blogroll as well.
BTW, if you're still not on my blogroll (and you want to be on it), please drop a comment.
Labels: del.icio.us, hacks, RubeTube


